
Paper Ink Blog
Sticker Paper Printing Mistakes: 10 Common Errors and How to Fix Them

Most sticker paper printing mistakes have nothing to do with a broken printer. They start earlier: a low-resolution file, no bleed, the wrong paper type selected in the print dialog, or a template that doesn’t line up with pre-cut labels. Below are the 10 errors we see most often, each with the symptom, the cause, and the fix.
Quick take
- Build the file at final size, 300 DPI, with logos and text as vector.
- Add about 3 mm (1/8″) of bleed and keep text 3 mm inside the cut line.
- Print at 100% scale and pick the matching paper type in your printer settings.
- Test on plain paper first, and let the ink dry before you cut.
Sticker paper printing mistakes at a glance
| Mistake | What you see | Why it happens | Fix |
|---|---|---|---|
| Low resolution | Jagged edges, fuzzy text | Small image scaled up | 300 DPI at final size, or vector |
| No bleed | Thin white sliver on the edge | Artwork stops at the cut line | Extend background ~3 mm past the cut |
| No safe zone | Clipped letters or QR code | Key elements too close to the edge | Keep text 3 mm inside the cut |
| Hairline details | Lines vanish or merge | Ink spread on small stickers | Bigger type, thicker strokes |
| “Fit to page” on | Stickers print slightly smaller | Driver auto-scales the page | Print at Actual Size / 100% |
| Wrong paper setting | Smearing or dull color | Ink load doesn’t suit the surface | Choose glossy, matte or label media |
| Wrong side or direction | Ink on the backing, upside-down art | Unknown feed orientation | Mark a test sheet with an arrow |
| Template misalignment | Art drifts off pre-cut shapes | Margins don’t match the sheet | Test on plain paper, adjust margins |
| Handling too soon | Fingerprints and smudges | Ink hasn’t set yet | Dry sheets flat and separate |
| No cutting gap | Ragged cuts, wasted stickers | Designs packed edge to edge | Leave room between stickers |
File mistakes (before you hit Print)
1. Low-resolution or copied-from-the-web artwork
Symptom: pixelated edges and soft, unreadable small text. Cause: a small JPG or a screenshot of your logo stretched to fill the sticker. Fix: design at the actual sticker size at 300 DPI, and export logos and type as vector (PDF or SVG). If the art came from an AI image tool, run it through our AI artwork prepress checklist first.
2. Missing bleed
Symptom: a thin white line on one or more edges after cutting. Cause: the background ends exactly at the trim line, so any small shift in printing or cutting exposes bare paper. Fix: extend colors and backgrounds roughly 3 mm (1/8″) beyond the cut. That extra strip is meant to be trimmed away.
3. Text and key elements too close to the edge
Symptom: a clipped letter in your store name or a QR code that won’t scan. Cause: no safe zone. Fix: keep all text, logos and codes at least 3 mm inside the cut line. For shaped stickers, see our guide to die-cut sticker file preparation.
4. Lines and type thinner than print can hold
Symptom: fine details disappear, or tight Arabic letterforms fill in. Cause: ink spreads slightly on paper, and it shows most on small stickers. Fix: don’t push type size too low, choose a clear typeface, and thicken or drop hairline frames. Print one at real size and read it at arm’s length.
Printer setting mistakes
5. Printing with “Fit to page”
Symptom: a 5 cm round label comes out a touch small and no longer fits the jar lid. Cause: most print dialogs shrink the page by default so nothing gets cut off. Fix: select Actual Size or 100% scale, and measure the first print with a ruler before running the rest.
6. Wrong media type selected
Symptom: ink smears on glossy sheets, or colors look washed out on matte. Cause: the driver is still set to “Plain paper,” so it lays down an ink volume that doesn’t suit the coating. Fix: pick the closest media (glossy, photo, matte, labels) and a higher quality mode. If smearing persists, the paper may simply not match your printer — our inkjet vs laser sticker paper guide covers compatibility.
7. Wrong side or wrong direction
Symptom: ink on the liner, or the design printed upside down. Cause: every printer feeds differently. Fix: draw an arrow on a plain sheet, load it, and print one page to learn which side prints and which edge goes in first.
8. Template doesn’t line up with pre-cut labels
Symptom: artwork sits a few millimeters off the circles or rectangles. Cause: page margins in your software don’t match the sheet, or auto-scaling is on. Fix: print the template on plain paper, hold it over the label sheet against a light, and nudge margins until everything matches. Don’t overload the tray; stacked sheets drift more.
After-print mistakes: drying and cutting
9. Touching or cutting before the ink sets
Symptom: fingerprints and streaks on dark areas. Cause: label coatings, especially glossy ones, take longer to hold desktop inkjet ink. Fix: lay sheets flat and apart rather than stacking them straight off the printer. Humid weather slows drying, so give it extra time.
10. No gap between stickers
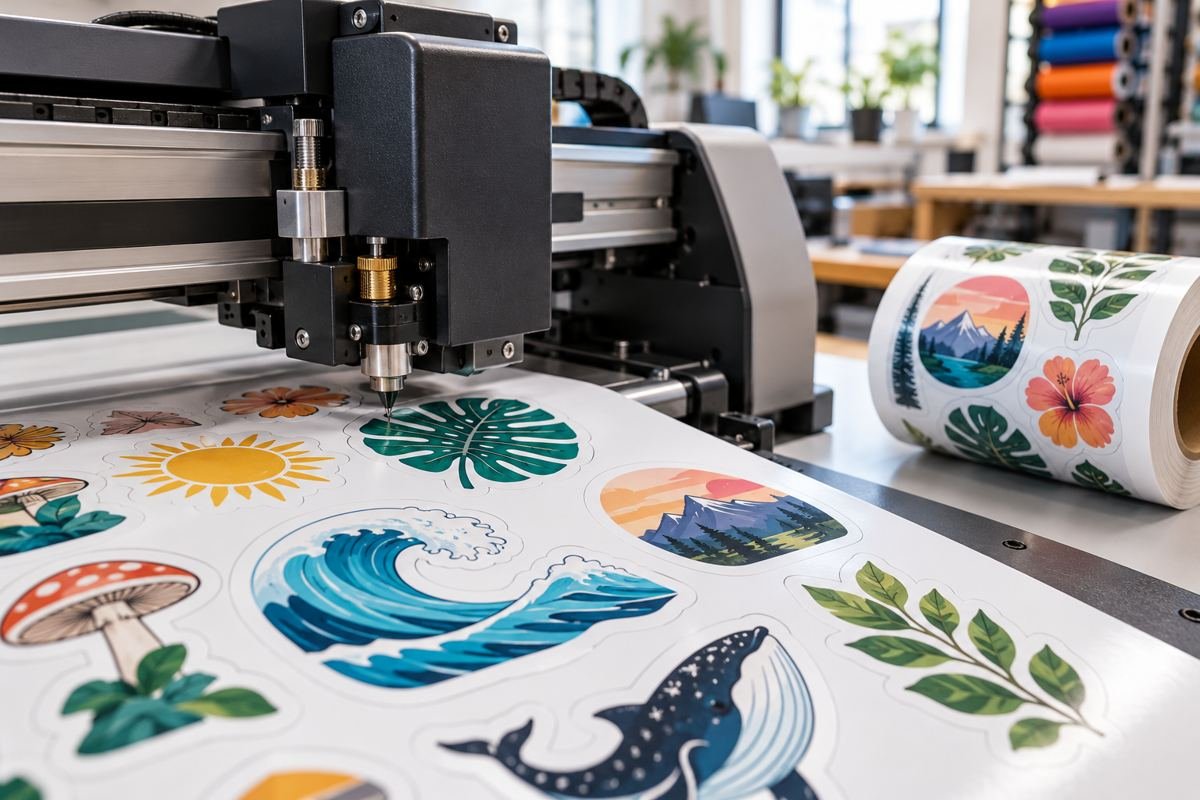
Symptom: cuts bite into the neighboring sticker and edges look ragged. Cause: squeezing as many designs as possible onto one sheet. Fix: leave enough space around each sticker for bleed and for your scissors, craft knife or cutter to move cleanly.
A 3-step test print before you use up your sticker paper
- Print on plain paper at actual size. Measure it and check it against the product or template.
- Print one sticker sheet with final settings. Once dry, check color, small text and edges.
- Cut and apply one sticker to the real surface — box, pouch or jar — and check it the next day before printing the full run.
When a print shop beats your home printer
A desktop printer is fine for small batches and prototypes. Once you need hundreds of stickers with consistent color from order to order, clean cuts around custom shapes, or a material that handles water and heat, it usually makes more sense to switch to custom sticker printing from Paper-Ink. We check your file and send a free digital proof before anything prints, offer design and file-prep help if your artwork isn’t ready, deliver across Saudi Arabia and the GCC, and ship free on orders of SAR 250 or more.
Top 10 Practical Recommendations to Avoid Sticker Paper Printing Mistakes
These ten habits save paper and ink. Apply them in order before your first real print run.
- Set the real size first. Build the file at the final sticker size so you never enlarge a small image.
- Export at 300 DPI. That resolution suits most stickers; go higher only for very fine detail.
- Keep logos as vectors. A PDF or SVG stays sharp at any size, as our die-cut sticker file guide explains.
- Add 3 mm of bleed. Extend the background past the cut line so a small shift never shows white.
- Keep text 3 mm inside. A safe margin stops letters from being clipped at the edge.
- Pick the right paper type. Choose glossy or labels in the print dialog, not plain paper, to prevent smearing.
- Turn off fit-to-page. Print at 100% so your template matches the cut lines.
- Test on plain paper. Hold the test sheet over the label sheet against a light to check alignment.
- Let the ink dry fully. Do not cut or stack sheets until the ink has set.
- Request a proof for bigger runs. For business quantities, request a quote and get a free digital proof before printing.
What’s New as of October 2026
Online Labels updated its guide to printing on clear sticker paper on 23 April 2026. For inkjet printers it suggests a photo or glossy paper type and a standard 300 DPI quality setting, because too much ink oversaturates the coating. It also advises letting prints dry for about 24 hours, as the Online Labels guide explains.
An August 2026 article on Print Technology recommends avoiding draft and normal modes and lowering ink volume slightly on glossy vinyl. It also mentions a sticker-paper preset in newer Canon firmware, without a version number, so check your own printer manual before relying on it.
Frequently Asked Questions About Sticker Paper Printing Mistakes
Why is there a white edge around my sticker after cutting?
Your design stops exactly at the cut line with no bleed, so even a tiny shift in printing or cutting reveals the paper underneath. Extend the background about 3 mm past the cut line and keep text and key elements 3 mm inside it. The edges then stay fully colored even when the cut drifts slightly.
What resolution should a sticker file be?
The common standard is 300 DPI at the final printed size. Logos and text are best kept as vector files such as PDF or SVG, because they stay sharp at any size. Don’t enlarge a small image after exporting it; go back to the original file or redraw the element so the edges print cleanly.
Why does ink smear on glossy sticker paper?
Usually the printer is still set to plain paper, so it lays down more ink than a coated surface can absorb. Switch the media setting to glossy or photo paper, let each sheet dry flat and apart before handling, and make sure the sticker paper is designed for your printer type, inkjet or laser.
How do I line up a template with pre-cut labels?
Print the template on plain paper at 100% scale, then hold it over the label sheet against a light and compare the shapes. If everything is shifted by the same amount, adjust the page margins in your software, confirm “Fit to page” is off, and avoid overfilling the paper tray before the real run.
When should I order stickers from a printer instead of printing at home?
When you need larger quantities with consistent color, precise cuts around custom shapes, or a material that stands up to water and heat. A print shop reduces waste and keeps results consistent between orders. With Paper-Ink you get a free digital proof before printing, plus file-prep help if you need it.
Ready to skip the trial and error? Send us your artwork and request a free digital proof to see the result before it prints.
Related reading: Mistakes to Avoid When Buying Printer Sticker Paper
What is the best print quality for sticker paper printing?
Use high quality at 300 DPI with a glossy or labels paper type. Avoid draft mode because it causes smearing and banding.
How long should printed stickers dry before cutting?
Let each sheet dry on its own. Some guides suggest about 24 hours for inkjet prints, so never cut or stack wet sheets.
Should I print at home or at a print shop?
Small batches suit a home printer, while business quantities are safer at a print shop. See our sticker printing service or message us on WhatsApp.