
Paper Ink Blog
Die-Cut Sticker File Preparation: Cut Lines, Bleed and Safe Areas

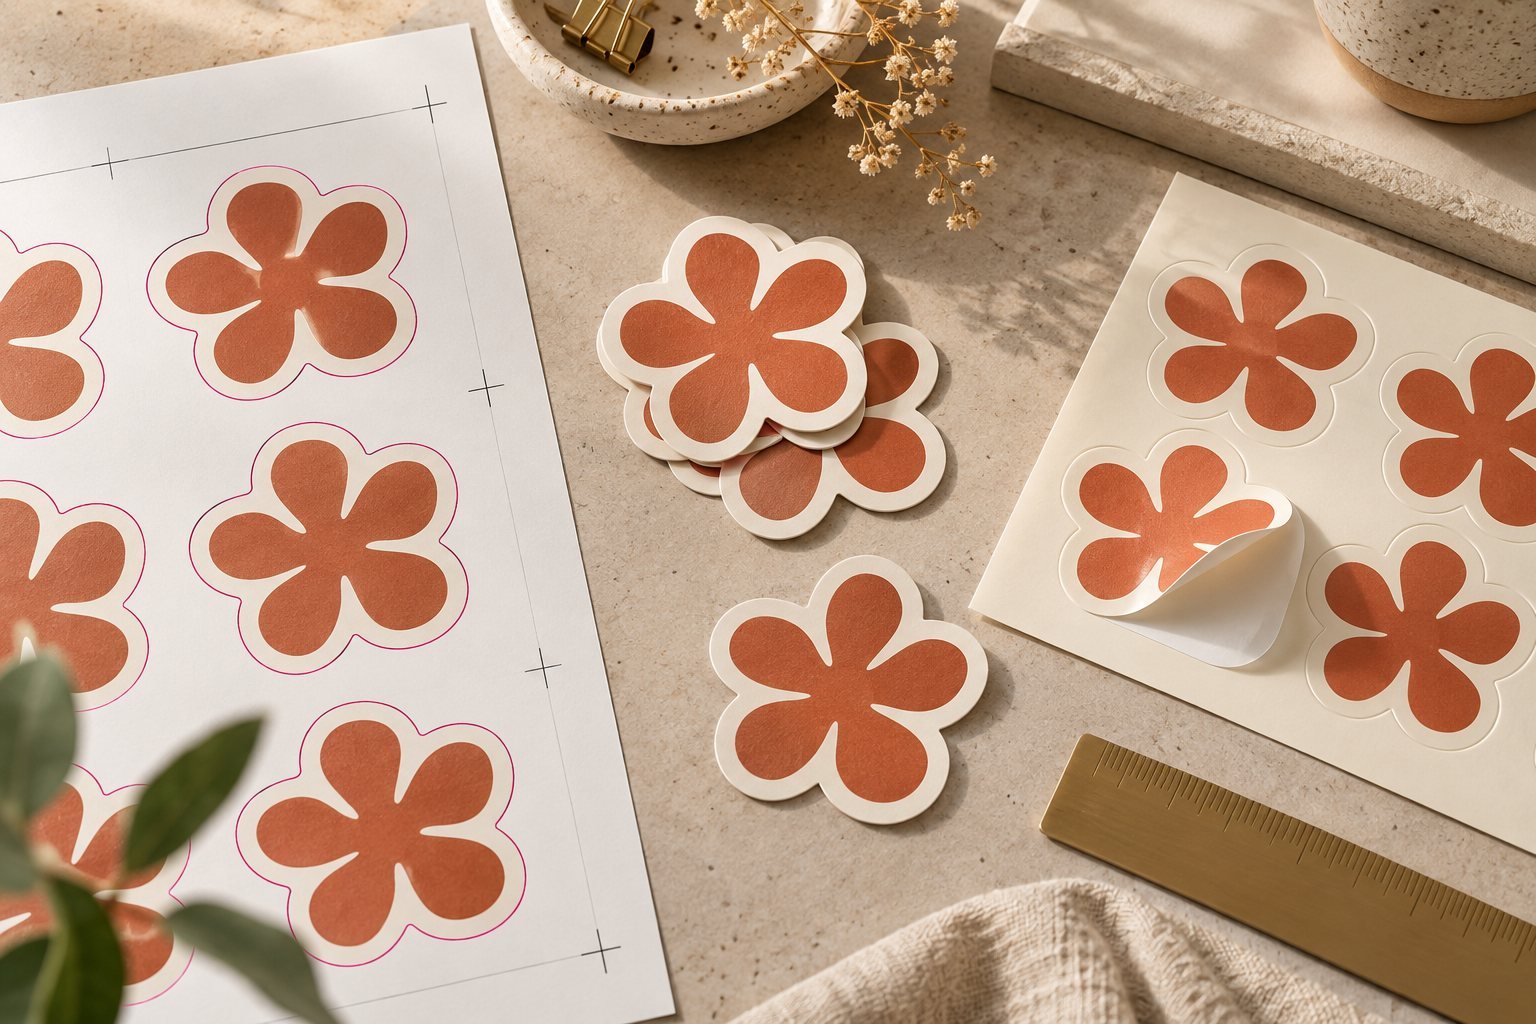
Die-cut sticker file preparation starts with the final dimensions, a separate cut path, artwork extending beyond that path and important details kept safely inside it. Confirm the printer’s template and delivery requirements before approving production.
This guide covers file preparation after you choose the shape. Browse sticker printing options if you still need to decide which material and format suit the application.
Build a clean, separate cut path
Use a closed vector path without accidental overlaps, duplicate lines or open ends. A low-resolution image edge is not a precise cutting instruction. Keep the cutting path separate from the printed artwork and ask the printer for its required layer name, line colour and settings.
A cut outline on a proof indicates the intended boundary; it should not appear in the finished print unless deliberately part of the design. Also, not every digital cutting job requires a physical metal die. The production method depends on the product and equipment.
Understand bleed and the safe area
- Bleed: background artwork extending outside the cut boundary to reduce unwanted white edges from small cutting shifts.
- Safe area: space inside the boundary that keeps essential text and logos away from the cut.
- Cut path: the line defining the finished sticker shape.
Adobe’s print bleed documentation explains extending artwork beyond the trim boundary. Ask your printer for the correct bleed and safe-area values; a single measurement does not apply to every sticker product.
Simplify fragile details at actual size
Very thin protrusions, sharp corners and narrow gaps can make stickers difficult to peel or more prone to tearing. Inspect the shape at the final dimensions and simplify weak sections where needed. A smoother outer contour can preserve the visual idea while making the finished piece easier to handle.
Full cut versus kiss-cut
A full die-cut separates the sticker and its backing into an individual piece. A kiss-cut cuts the face material while leaving the release liner intact. Kiss-cut labels can be supplied on sheets or other formats; the term does not automatically mean a multi-design sheet.
Individual pieces can suit giveaways. A kiss-cut format may suit organized application and convenient peeling. When the artwork carries ingredients or a barcode, also check product information label layout and testing.
Preflight checklist for your sticker file
- Set the document to the intended final size and state the units.
- Keep the cutting path closed, clean and separate.
- Extend backgrounds to the agreed bleed and keep essential details inside the safe area.
- Check image quality at final size and include linked artwork.
- Embed fonts or outline them as the printer requests, retaining an editable master.
- Confirm the colour profile and any white-ink or special-finish layers.
- Agree the export format and approve the final proof.
A print-ready PDF may be suitable, but export settings depend on the workflow. Do not add crop marks or change colour settings without checking. The Illustrator PDF export documentation describes available export controls.
Frequently asked questions
Can I send a PNG or JPG?
A suitable image may work for the printed artwork, but it does not by itself provide a vector cutting path. Send it for review to establish what additional preparation is needed.
Must every font be outlined?
Follow the printer’s requirements. Font embedding may be appropriate in some workflows, while others request outlines. Keep an editable original in either case.
Does custom cutting affect the quote?
Shape, size and production method can influence the price. See the sticker printing quote guide and compare the same specifications.
Send your artwork to Paper Ink for review with the dimensions, quantity, material and preferred supply format.
