
Paper Ink Blog
Coffee Cup Stickers: How to Choose Size and Material for Hot and Cold Drinks

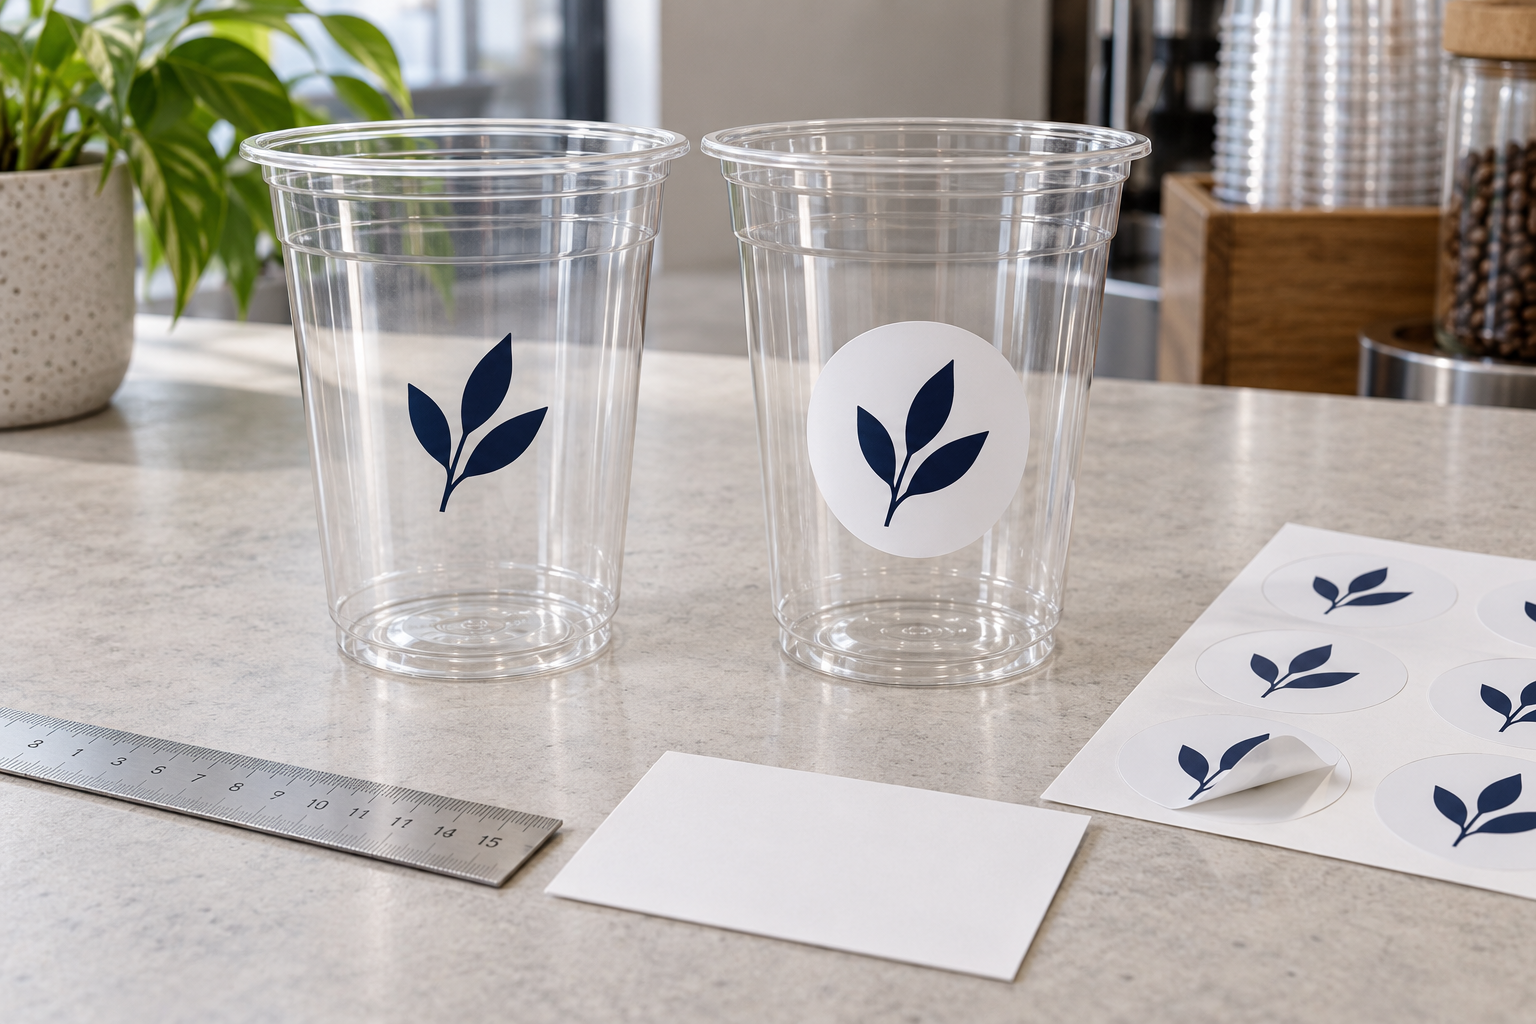
Quick answer: The best coffee cup stickers are the ones that suit the cup surface and the way you serve the drink, not one material for every case. For a hot cup with a dry outer surface, compare a suitable paper with alternatives that survive real use. For a cold cup that collects condensation, start by comparing a suitable film material such as vinyl, with an adhesive and print made for condensation. In both cases, approve the size only after testing it on the cup itself. See the Avery guide to film, paper and vinyl labels for the material basics.
Your goal is a sticker that stays on, a logo that reads clearly, and a setup that does not slow your café team. To get there, settle the cup type, the use conditions, the size and the application method before you order a production quantity. For the production basics, read how custom stickers are printed and cut.
Define the cup before you choose a sticker material
Do not stop at “a 12 oz coffee cup”. That describes capacity, but a sticker order needs details about the outer wall it will stick to. Is it smooth paper, a coated surface, a specific type of plastic, a corrugated sleeve or a separate cardboard band? A different surface and curve changes the adhesive choice. The HERMA adhesives guide separates applications for rough, cold, wet and curved surfaces.
Send a photo of the cup, the product name or supplier item number, and the size of the logo area. If you use one cup for hot drinks and another for cold, record them as two separate specifications even if the logo is the same. Also keep a reference cup of each type with the approved sticker specification. When you change cup supplier or shape, repeat the comparison instead of assuming that equal capacity means equal sticker area.
Coffee cup stickers for hot cups: check the surface heat, not only the drink
If the sticker position stays dry, a suitable paper deserves a comparison, especially when its job is to carry a logo during a short serving time. Moisture and rubbing, however, need another material or a protective finish on the face. For the basic comparison, read our guide to paper vs vinyl stickers.
With heat, separate the moment of application from what happens afterward. OnlineLabels specifications give one limit for application temperature and another range for use after application. A wide use range does not mean the label sticks under the same conditions from the first moment. These are their own product specifications, not tolerances of Paper Ink products.
In practice, do not transfer the coffee temperature straight to the outer sticker specification. Note the cup wall type, any cardboard sleeve, and the time you apply the sticker relative to filling. Then ask the printer to confirm the material and adhesive for that case. Also, a logo sticker does not replace the cup’s own hand protection.
Coffee cup stickers for cold cups: test condensation, print and grip
With an iced drink, the question is not only “is the face waterproof?” Ask too whether the edges stay fixed and whether the print smears when someone holds or wipes the cup. Avery separates limited moisture exposure from repeated exposure or immersion in its waterproof vs water-resistant guide, and it stresses that grip on the surface is part of performance.
Start by comparing a film suited to moisture, and then confirm the adhesive, the print and the finish. Vinyl is one film option, but its name alone does not guarantee success on every plastic cup or for every exposure time. The need may differ between a cup served at once and a cup that waits inside a delivery order.
Should you apply the sticker before or after filling the cup?
For a first comparison, apply the sticker to a clean, dry outer wall before condensation starts, following the supplier’s instructions. If your workflow forces application after filling, on a cold or wet surface, say so from the start. Some adhesives are made for specific wet applications, but you cannot assume a regular adhesive does the same job. Also ask how long to wait before the sticker faces use. Do not rely on a general number such as “wait 24 hours” for every material.
Choosing coffee cup stickers by cup type
These are suggestions for comparison and testing, not performance guarantees.
- Hot cup with a smooth, dry paper surface: test edge hold after filling and handling. Compare a suitable paper, or a film if you need extra durability. Send the cup spec, the application time and the serving duration.
- Hot cup, corrugated or with a cardboard sleeve: test how the sticker contacts the surface and how clear the logo stays. Evaluate a smooth area or the sleeve itself, and do not stretch the sticker over ridges. Send a photo of the position.
- Cold plastic cup with condensation: test the edges and the print after wetting and handling. Compare a suitable film with an adhesive confirmed for the surface. Send the plastic type, cup condition and application time.
- Cup with tapered sides and a wide logo: test wrinkling and flat edges. Try a smaller area or a better shape, and check the wrap template. Send the sticker area dimensions and a side photo.
- Cold cup inside a delivery order: test performance until the end of the real serving journey. Evaluate a build accepted for the time, moisture and handling. Send the preparation, filling and transport sequence.
Coffee cup sticker size: test on the cup, not on the screen
No single size fits every café cup based on capacity alone. Start with an area that suits the logo, then print a real-size sample and compare it on the cup. OnlineLabels offers measuring tools for this, and it advises printing at actual size instead of letting the page scale. See their guide to finding your label size.
As a test example, cut two round samples, 4 cm and 5 cm across. Compare the logo position, how well the café name reads, and how flat the sample sits on the sides. These sizes are for comparison, not a fixed recommendation for an 8, 12 or 16 oz cup. If the cup is wider at the top and narrower at the bottom, a wrap sticker needs a shape review, not only the width of a rectangle. A temporary paper sample tests size and shape only, not adhesive grip.
Where should the logo go?
We suggest a visible position that the sleeve or the cup holder does not hide at handover, and one that does not cross a seam or bump without a test. Leave comfortable space around the logo, and check how it reads when the cup is full, especially on a clear background.
This guide covers the sticker on the outer wall only, not the inside of the cup or the drinking rim. Do not treat an outside position or a “water-resistant” label as food approval. Migration of adhesive components and food-packaging suitability are a separate specification matter, as the HERMA migration safety page explains. Review any direct or indirect contact with the supplier, using documents for your actual build.
Run a trial before you approve the quantity
A digital preview helps you review the design, but it does not test grip on your cup. Ask whether a printed sample is possible and what it costs, then test it under your normal serving conditions. Supplier guides recommend testing in real use before scaling up, not relying on the material description alone.
Take a hypothetical café in Riyadh. It wants to compare two candidate specifications on a hot cup and a cold cup. It could start with twenty cups, five trials for each specification on each type. This is only an illustrative layout for an internal trial. It is not a minimum order and not a statistical sample size that guarantees quality.
- Fix the trial elements. Use the real cups, and the same logo, size and position within each comparison. Record the material, adhesive and finish names as the supplier states them.
- Apply with the approved instructions. Prepare a clean, dry surface when the specification requires it, and limit touching the adhesive face. Smooth the sticker from the center outward without wrinkling it. See OnlineLabels on how to apply labels.
- Mimic the order journey. Fill the cup the usual way, add the lid and sleeve, and review the sample after preparation and at the end of the serving or delivery time you set. Do not change the drink temperature or add exposure just for the test.
- Record results, not impressions. Check the edges, the reading and the print, and photograph any defect with the time it appeared. When you change one element, write down what changed.
If the edges lift on one cup, do not conclude at once that the answer is a thicker vinyl. Send the result to the supplier and review the surface, size, adhesive and application time. The aim is to fix the cause, not to buy a stronger-sounding description.
Quantity and supply: count application time along with price
Before you choose the biggest quantity, work out the use for each cup type and whether the logo is permanent or tied to a short season. Ask for the quantity per design and the selling unit: a number of stickers or a number of sheets. When you compare quotes, fix the size, material, finish and cut, and add the cost of file preparation, shipping and any sample.
Then test peeling and applying a small batch. The difference in application time and rejected pieces is part of the operating decision, not only the price per piece. When you compare sheets with single pieces or a roll, first confirm the supply method is available for your order. Do not assume a roll is available or always faster without trying how your team uses it.
Print on the cup or an outer sticker?
The logo may look the same in a photo, but the ordering, application and stock management differ. With direct printing, your identity is produced on the cup to the agreed specification. A sticker, on the other hand, is printed separately and fixed to the outer wall. Neither path always wins, so compare the cup model, quantity, design, serving conditions and the work required.
Compare the total and the usable count, not the printing price alone. On the sticker path, add the cup purchase, the sticker cost, the application time and the pieces you reject in the trial. On the direct-print path, confirm the quantity per design and what the quote includes, such as cup, lid, preparation and delivery. Also count leftover seasonal stock instead of assuming every piece will be used. Paper Ink lists printed plastic cups, but the product alone does not prove a specific technique or tolerance for every service condition.
How to order coffee cup stickers from Paper Ink
Start from the sticker printing options at Paper Ink, then review the custom vinyl product if its specification suits you after confirmation. The published form lets you upload a PDF, enter width and height in millimeters, and set the number of copies. It also lists options such as gloss lamination and full cut. These options do not guarantee suitability for every hot or cold cup.
After you approve the size, use a sticker file preparation guide to review your file. Do not send only a photo of the cup and leave the size to guesswork. Attach the sticker area dimensions, the drink type and the condition of the cup at application time. Then send your cup type and size and ask for a review of the sticker specification, or message us on WhatsApp. The right start is a specific cup and a clear use. After that, you choose the sticker, not the other way around.
Top 10 practical tips for choosing coffee cup stickers
These steps help your coffee cup stickers stay on and stay clear. Try them before you approve the quantity.
- Define the cup first. Decide whether it is paper, plastic or double-walled, because the surface changes the result.
- Separate hot from cold. Each has a different problem: heat in the first, condensation in the second.
- Check the outer surface temperature. The heat of the surface the sticker touches matters more than the drink itself.
- Choose a condensation-proof material for cold cups. Plain paper wrinkles when wet, while vinyl and clear films keep their grip, as the 4over4 comparison explains.
- Match the adhesive to the cup surface. A coated paper cup behaves differently from plastic with the same adhesive.
- Test the size on a real cup. Print a sample at actual size and check it.
- Check the cup curve. The curve can crop part of the logo if the size is too large.
- Apply to a dry, clean surface. Water or oil under the sticker weakens grip from the first moment.
- Run a real trial. Fill several cups, wait through a full serving cycle, then check the edges and print.
- Request a free digital proof. We review size and design with you before printing.
Latest updates as of October 2026
We found no new confirmed update specific to cup stickers. Still, the available references confirm that material and environment come first.
The 4over4 comparison explains that plain paper absorbs water and curls at the edges, while vinyl and clear films keep their grip under condensation and cold. This applies to cold cups in particular. In addition, Avery updated its durable label materials guide on 21 October 2026, according to the page. The guide ranks paper as the least resistant to water and oil, and vinyl as the most durable.
Frequently asked questions about coffee cup stickers
Is a paper sticker suitable for a hot coffee cup?
It may be a candidate when its position is dry and its specification suits the surface heat. Do not choose plain paper for hot cups automatically, and do not rule out all paper. Compare a suitable build on your cup.
Which sticker will not come off a cold coffee cup?
Do not decide by material name alone. Compare a material that survives condensation with an adhesive that suits the cup surface, then check the edges and print after a full use cycle.
Is 5 cm right for every café cup?
Do not treat it as a rule. Try it as a real-size sample on each cup type, and check the curve and logo reading before you set the final size.
Can I apply the sticker to a wet cup after filling?
Only when you confirm a specification made for application on a cold, wet surface. Surviving water after application is not enough proof that it sticks on top of water.
Can a coffee bag label work on the cup?
Do not pick it just because it is made for coffee. Compare function, size, surface and conditions, because a data label for a bag and a logo sticker for a cold cup are different needs.
What is the best size for a cup sticker?
It depends on the cup diameter and curve. Review a size guide, then test a real sample.
Is vinyl better than paper for a cold cup?
Often yes, because condensation harms plain paper. Read our comparison of paper and vinyl stickers before you decide.
Do I get a preview before printing?
Yes. We send a free digital proof before printing so you can review the design and size. Real application still needs your trial on the cup.
How long do orders and delivery take?
Most orders take 3 to 5 working days, then shipping takes 24 to 72 hours. Shipping is free for orders of SAR 250 or more.
Sources
These sources explain materials, application and measuring. They are not performance certificates for Paper Ink products.
- HERMA: Adhesives
- Avery: Film, Paper, or Vinyl Labels
- Avery: Waterproof vs. Water-Resistant Labels
- OnlineLabels: Temperature-resistant labels
Ready to print your design?
Choose your sticker type and set your specifications. We send a free digital proof before printing, and there is no minimum order.
